
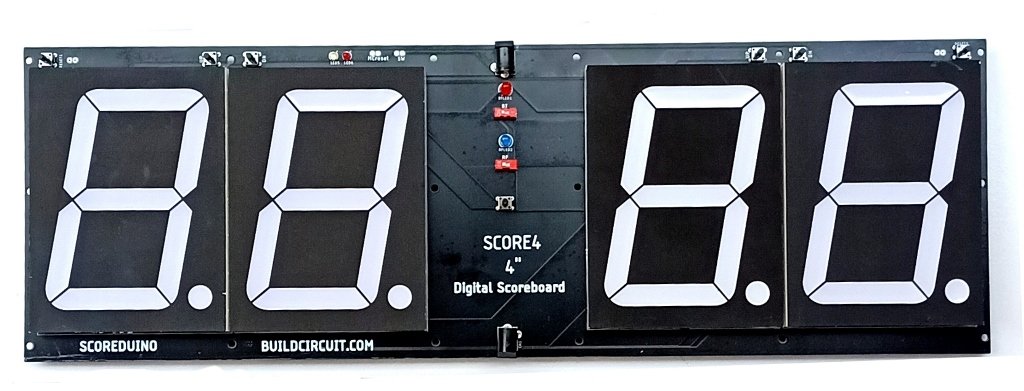
This is a DIY digital scoreboard for indoor games. All the modules of the scoreboard come fully assembled. You just have to find a way to fix it on a wooden board or make other arrangements.
There are 3 modules in each scoreboard:
- SCOREDUINO-B: This is the central module of the Scoreboard. This is an Arduino-based controller supported by a Bluetooth module and an RF module for communicating with the 2 digits displays placed on its two sides. Read more about SCOREDUINO-B.
- The right display: The right display gets up and down count commands from the central Scoreduino-B controller. The commands can be sent by RF remote control or SCORE4 module of the Scoreduino app. Specific numbers can also be sent to the right display.
- The left display: The left display also gets up and down count commands from the central Scoreduino-B controller. The commands can be sent by RF remote control or SCORE4 module of the Scoreduino app. Specific numbers can also be sent to the left display.
Other supporting modules:
- RF receiver and the remote control: It uses the basic 4CH (the videos show 6CH, we sell 4CH only) RF module and remote control to send commands.
- Bluetooth module: The scoreboard can be controlled with SCORE4 module of the Scoreduino app and it communicates via Bluetooth.
Power supply: The 3″ detachable scoreboard works with 12V power supply
How does it work?
To understand this working principle of Scoreboard, you need to understand two modules:
- SCOREDUINO-B: This is an Arduino based controller that sends up and down commands to up and down counters. The schematic of SCOREDUINO-B.
- Single-digit up and down counter module: We have described how 74LS192 based up and down counter modules work. You need to combine two of the single-digit counters and connect them to SCOREDUINO-B. The schematic of single-digit counter.
- You can also read about Scoreduino-A.

These are the pins on the Scoreduino-B board:
On the left side:
- 9V: This is to power up RED colored 2.3″ displays. We get this voltage from the voltage regulator LM78XX.
- 5V: 5V is used for CD4511 and 74LS192/CD40192 on the left side
- GND: GND of SCOREDUINO-B connects with the GND of 2 digits up/down counter
- A: Send pulse from SCOREDUINO-B via this pin in order to count UP
- B: Send pulse from SCOREDUINO-B via this pin in order to count down
- 14: Reset pin. Send pulse to reset the count.
On the right side:
- V: V depends upon the color of the displays used on the right side. For example, GREEN colored 2.3″ display needs 12V. This is the default supply voltage.
- 5V: 5V is used for CD4511 and 74LS192/CD40192 on the right side
- GND: GND of SCOREDUINO-B connects with the GND of 2 digits up/down counter
- C: Send pulse from SCOREDUINO-B via this pin in order to count UP
- D: Send pulse from SCOREDUINO-B via this pin in order to count down
- 14: Reset pin. Send pulse to reset the count.
We are selling various types of smartphone-operated digital scoreboards!


